If you have a Asus Zenfone 4 Selfie Pro android Smartphone and you want to root it without PC, Mac or laptop safely then you are in the right place.This simple article will guide you to Root Zenfone 4 Selfie Pro.
he Asus ZenFone 4 Selfie Pro is powered by 2GHz octa-core Snapdragon 625 processor and it comes with 4GB of RAM. The phone packs 64GB of internal storage that can be expanded up to 2GB via a microSD card. As far as the cameras are concerned, the Asus ZenFone 4 Selfie Pro packs a 16-megapixel primary camera on the rear and a 12-megapixel front shooter for selfies.

Why Root? Rooting your android device you can do as much as customization’s on your device, Like you can installing Custom ROMs, Remove Preinstalled Bloadware, Blocking Ads in Any Apps, Install Incompatible Apps, Change Skin for your Android, Boost your Android Device’s Speed and Battrey Life, Add External Storage, and many more.
How To Root Zenfone 4 Selfie Pro
This tutorial support for Asus Zenfone 4 Selfie Pro only.
Download All :
Step 1: Unlock Bootloader
- Unlock Bootloader using Unlock Bootloader Tools (Install .apk and follow instruction in app).
- Enable developer options, go to settings ⇒ About phone ⇒ Tap on “build number” 7 times to enable developer options.
- Enable USB Debugging, go to settings ⇒ Developer options ⇒ Enable “usb debugging”.
- Enable OEM UnlockB, go to settings ⇒ Developer options ⇒ Enable “OEM unlock”.
Step 2: Install TWRP Recovery
- Download ADB Fastboot Tool and unzip it.
- Download TWRP Recovery and copy to adb-fastboot-tool-2016 Folder.
- Open cmd windows in adb-fastboot-tool-2016 folder by hold Shift + Mouse Right click.


- Connect your phone to PC and type adb devices to check connection your phone with PC.

- Now type adb reboot bootloader on command window(CMD) and hit enter to reboot your phone into bootloader (fastboot) mode.

- Type fastboot flash recovery twrp-3.1.1-0-Z01M.img on command window(CMD) and hit enter to Flash TWRP Recovery.
- Type fastboot oem reboot-recovery on command window(CMD) and hit enter to reboot the device to recovery.
- Finish. Now go to the root step.
Step 3: Root Zenfone 4 Selfie Pro
- Download Magisk-v14.0 copy it to the phone.
- Turn off your phone and turn onto recovery mode By Volume Up + Power In bootloader screen select recovery.
- Now Allow Modifications “Swipe to Allow Modifications” allow it.
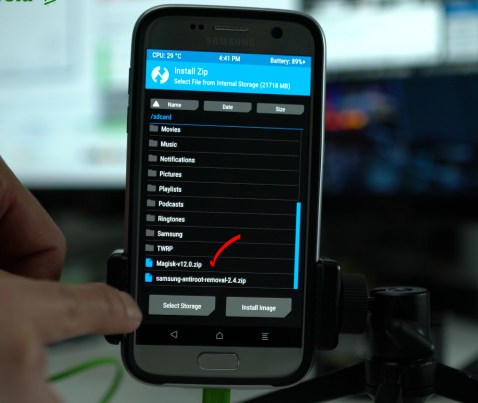
- Go to Install Navigate to Magisk-v14.0.zip.

- Swipe to install.

- Reboot your phone Install Magisk Manager.
- Finish. You have successfully rooted Redmi Note 4 and installed TWRP Recovery. For confirmation, do download and install an app called “Root Checker” on your device.
Well maybe it’s just this tutorial about How To Root Asus Zenfone 4 Selfie Pro. I would expect to see more articles. Hopefully the tutorial is useful. If you want to request articles or provide suggestions & criticism please contact me at Contact Me. If you have any problems do comment below. Also, for more updates like our Facebook page.

 Genkes How To and Reviews Technology


